
I’ve been putting together some projects to write up for my next ebooks. And I actually had a little project today that turned out really well. I thought maybe you’d like to get a free “how to” on how to repair a chipped ceramic piece.
I have a huge old blue-sponged mixing bowl, marked “Robinson Ransbottom, Roseville OH, U.S.A., mixing bowl, 15″ 8 qt.” on the bottom. I’ve had it forever. Someone saw it at my indoor tag sale. I’d forgotten to put it out! (You can see more of the goodies at my online sale gallery.
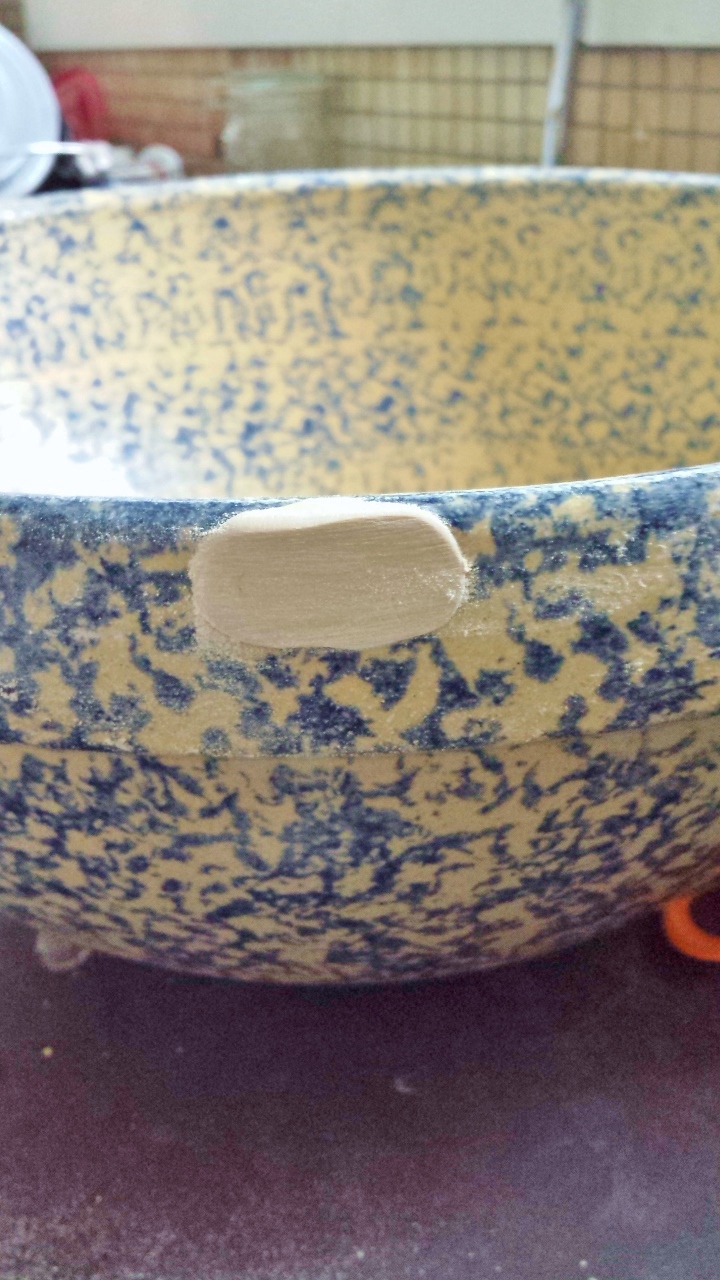
She wanted to take a closer look. But when my husband brought it down from the cupboard, I found a new chip in the glaze.
I was heartsick. The value of this bowl is at least $75. The chip is mostly on the outside of the rim, and won’t affect its usefulness. But it does look bad. (image 1)
Now usually I would take a blue magic marker to something like this. Simply coloring the exposed brighter clay would go far to make the chip less noticeable.
But then I tried a trick I’ve used before.
When a piece gets knocked or notched–a china ear chips off, or a chunk is missing, I actually use POLYMER CLAY to fill it in.
Here’s how you do it:
Materials:
Polymer clay in a matching color. (I used a clay color that matched the base glaze color, and blue acrylic paint for the sponged pattern.)
Super glue (image 3)
CA activator, Zip Kick activator spray or any other super glue activator (Trust me, this item will be your new best friend when it comes to using super glue!) (image 4)
A piece of rough sandpaper and a small block of wood (I used a rubber stamp because I was too lazy to look for a little block of wood.) (image 5)
3M wet/dry sanding sponge, fine, superfine or ultra fine. (image 5)
Acrylic paint to match (You can use this to paint the entire baked patch, or to recreate a pattern or design like I did) (image 8)
Small paint brush (like tiny small) (image 9)
Paint sponge (or tear off a big chunk of a kitchen sponge and use that.) (image 11)
Soft cloth (I used a kitchen towel because it was there.)
Instructions:
Step 1: Use a chunk of polymer clay in a matching color, or mix to match. In this case, “champagne” was an almost perfect match for the glazed stoneware base glaze. I conditioned it by kneading it until it was malleable, and pushed it into the chipped area. This is what it looked like (Image 2):
Really push the clay into the chipped space. You want a good contact with the clay surface for a good fit.
Step 2: Gently remove your lump o’clay patch. Try not to deform the lump. Bake it in your firing oven at 265 degrees (or the manufacturer’s recommendation) for 30 minutes. Let cool and remove from oven.
Step 3: Apply glue to the object’s surface. (image 3) (You can apply glue to either surface, but I figured it would be easier to work with a glue-free chip-filler blob. You may be more careful than I usually am.) Remove the cap from your glue activator. (Image 4)
What does the glue activator do? It makes super glue set INSTANTLY.
The problem with many super glue repairs is, it takes pressure and a bit of time for the glue to set. Although it’s supposed to be “instant”, sometimes it just takes a little longer. But move the patch before it’s dry, or if it isn’t lined up exactly, the attached piece will pop off.
When you spritz the glued area with the activator, the activator will seep into the glued area and INSTANTLY set the glue. It ensures a faster, more reliable adhesion.)


Step 4: Line up the patch with the chip, and press the patch/chip-filler as hard as you can with one hand. With your other hand, spritz along the EDGE of your patch, as if you were trying to squirt into the tiny space between the patch and the chip. (This is why you need to have the activator cap off beforehand. Trust me. I’ve learned the hard way.)
The patch should stick instantly.
If it doesn’t, apply a drop of glue to an area that are free of the first glue try, and try it again. (Glue won’t stick to glue.) You only need a tiny area to “catch” to make an effective patch.
So now you have a glob of baked clay stuck to your bowl. What now?
Step 5: Now we’re going to sand it down to match the surface shape of the bowl. For a large smooth profile like the bowl, rough sandpaper wrapped around a hard, flat thing (like a little block of wood!) will help you smooth and shape the surface of the patch. (image 5)

You’re removing enough patch mass (a new phrase!) to fit in the the bowl’s original profile. (image 6) Stop before you’ve gone TOO far, though! You can always take off more, but you can’t add it back in later. 
When you’re pretty close to matching the surrounding surface, switch to the finer sanding sponge. Polymer clay sands smoother and faster with water (since it tends to gum up sandpaper quickly), so dampen the sanding sponge if you’d like.
Polymer doesn’t have a grain, so it won’t matter what direction you sand it in. You can go vigorously (especially with the dry sandpaper) until you are within shaping-range. And focus on the patch, not the rest of the bowl. Glaze is really tough and hard to scratch. But you don’t want to test that, either!
I used a circular motion around the edges of the patch, so I could REALLY smooth them out.
When you’re finished, the patch should feel almost seamless to the touch.
And it should look like this (image 7) :

Now, if you were mending a solid color item, and you used a patch made with clay that matches it, you could stop here.
But we have a sponged design on the bowl, and the repair is still obvious. I COULD have used a blue patch, and it would have been less noticeable. But I wanted to see if I could actually….
Step 6: Paint the patch! So here are the paints (image 8):

You need very little paint to sponge, so just a tiny squish of each color ought to do it. (image 9)

I still didn’t have the right shade of blue. Maybe purple….? But do I have any purple? I hardly ever use that color….
Yes! (image 10) 
And now for the sponge (image 11).

Step 7: Wet the painting sponge (not the sanding sponge!) and squeeze it nearly dry. Dab it into your paint and test with a piece of white paper. (I forgot this, so I just grabbed a paper towel.) After you experiment a little, you’ll get a feel for how much paint, how hard to sponge, etc.

Sponge your patch! (image 11) As you can see, I put on a lit-tul too much. (image 9) I should have quit sooner. But it still looks pretty awesome, doesn’t it?
Step 8: Let the paint dry thoroughly, then buff with a soft dry cloth. This will shine up the paint a little, enough to match the soft shine of the bowl itself.
Now….can you see the patch? (image 10)


Can you see it here? (image 11)
Now for the hard question: How durable is this repair? And how safe is it for food purposes?
I wouldn’t bake this bowl. The polymer clay is safe to heat up to 300 degrees or so. But it can scorch at higher temperatures. But why would you bake a mixing bowl???
How durable is the paint treatment? I use acrylic paint as a glaze on my handmade artifacts. I DON’T use any glazes or finishes over the paint–just polishing with a power buffer. Some of them have gone through the laundry, or into hot tubs, or swimming, and the paint has been okay. I think the polishing, even with just a cloth, helps shine and “seal” the surface somewhat. But I wouldn’t put this bowl in a tub of soapy dishwater, nor put it in the dishwasher. (But it’s too big for a dishwasher anyway!)
It’s food-safe, so you can certainly use the bowl to hold stuff: Fruit (real and faux), billiard balls (!!), and so on. If you use it to actually mix stuff, I would wash and rinse carefully, making sure not to scrub or soak the patched area.
But it’s still an easy, affordable, effective patch. And I’m delighted with the results!
(Author’s note: I apologize for the awkward formatting. I have never figured out how to layout images and text with WordPress, despite constant experimenting and positioning. If anyone knows of a good tutorial, point me at it!)
