SELF-CONSCIOUS CRAP

How did this little fragment get me started on an entire new series? Read on!

Trying too hard is the kiss of death for creative projects.

I don’t know if this happens to you. But sometimes when I’m trying to create, I get caught up in what I want my end result to be. And very quickly, I find myself totally off-course.

Now, that seems a little counter-intuitive. Aren’t we supposed to have goals? How can we accomplish anything if we don’t know what we want our end results to be???

Here’s an example right in front of your nose–literally! (You’re reading this, aren’t you?) :^)

Sometimes when I sit down to write in my blog, I think, “Wow, that was a really funny post I wrote yesterday! I’d like to do that again.”

I try to think of funny things to write about. Soon I’m trying to “force” a subject. The writing gets labored and self-conscious. I eventually quit in frustration.

This happened awhile back because I was sending samples of my writing to a new editor. As I pulled together the columns I wrote for Crafts Business magazine, I started reading them and laughing. “Damn, I’m good!” I thought. “I loved writing this column! Just look how funny these are!”

Kiss o’ death to a writer. I could not think of anything to write about for the next few days. I was trying so hard to be funny, I couldn’t even think of anything to be funny about.

Same if I try to write about something serious. I start sounding pompous about six minutes in.

If I try to make “a really great piece” when I put my fiber collages together, it gets even stickier. Suddenly, nothing looks right, nothing clicks. And halfway through, I chuck the whole thing in frustration.

There’s a similar effect for some people in martial arts. Performing a kata in front of the whole class, for example. Some get caught up in how they look to others. They forget to focus simply on what they’re doing. It’s agonizing to watch, too. Especially to those of us who realize we do the same thing when it’s our turn to perform a kata.

I think this happens because this mindset–putting our focus over “there”, “there” being someone else’s judgmental mind–gives over way too much power to our Inner Critic. We try to look at ourselves the way we think other people look at us.

The minute we set ourselves up for, “I’m going to be funny today!”, the Inner Critic is right there with us: “That’s not very funny. That’s not funny, either. Hey, maybe….mmmmm, nope. No. Sorry.”

Our Inner Critic starts out as an internal bullshit detector, a very useful creature to have in our brain. It can keep us from getting too full of ourselves. But when you let him drive all the time, then he becomes that Non-Stop Inner Critic–a lethal combination. And putting that guy in the yoke with your Inner Artist/Performer/Class Clown means your brain is going to go in circles. (I had a metaphor going there but I lost it. Sorry. It was something about oxen.) The two Inners are too busy fighting about who’s in charge. Your creative movement goes right out the (car) door. (Barn door??)

We temporarily lose our way by focusing on the effect we want to create. We have stepped away from our authentic voice–the place where we focus on what’s important to us–and instead given focus to what we think other people will find important.

Once you try to work for other people, you are lost. Mostly because “other people” is too big an audience. Too many points of view to consider, too much ground to cover.

Come to think of it, that’s why singers and speakers are often told to envision themselves performing for a single member of their audience. It’s so they can bring that focus down to one concentrated point.

I’ve found a few approaches to working through the self-conscious crap thing.

PLAY. Warm up with little exercises that aren’t as emotionally loaded with expectation. With fiber, that might mean working with a tight color scheme, and simply playing with smaller compositions (I call them “fragments”) and different uses of those colors. The “play” or “study” aspect allows my brain to get flowing in that more natural creative mindset again. “Hey, that one looks cool! What if I used a pumpkin-colored button instead of goldenrod?” Soon something exciting is happening. The brain is focused simply on what really matters to you as a visual artist–composition, contrast, eye movement. Your creative footing becomes sure again. You can move confidently ahead.

Yes. No. Yes!
Yes. No. Yes!

PRACTICE. With martial arts, it’s doing those damn kata about a jillion times, until our body can almost do it in our sleep. As the body moves with confidence about what movement comes next, we can focus on what really matters–balance, rhythm, power. Your footing literally becomes sure again. You know what to do.

PAY ATTENTION. It’s paying attention to what matters to me. Forget about that audience for the moment.

Is there an incident that’s bugging me? Why did it bug me? Aha! Once I have insight into that, I can expand upon it and write about it. Did something frustrating happen? How did I work through it? Aha! There’s another insight, an idea of how to stay committed to my dream when things get hard. And here’s way to use humor to get through the some of the scruffier parts of life.

When you start with what catches your interest, your heart, and go from there, the work will follow, naturally. When these basic self-focus points are created, then the work can move on more naturally to something more powerful.
Your audience will just naturally come right along with you.

And if they don’t, well, at least maybe your mother thinks you’re funny.

(“Self-Conscious Crap” originally published on my old Radio Userland blog on April 13, 2007.
And I was not trying to be funny nor serious, so there.)

GREAT ARTICLE on my artwork in THE UNION LEADER!

Luann Udell in her Keene studio. She draws inspiration for her artwork from the prehistoric drawings in the Lascaux Caves of France, to which she was introduced as an art history student at the University of Michigan. (Melanie Plenda/Union Leader Correspondent)

So I found the link for the nice article about me in the March 7, 2014 Union Leader! You can read “Cave drawings influence Luann Udell’s art; her 5-year-old sparked her career” and let me know what you think!

Melanie Plenda was a wonderful interviewer. She “got” me and what my art is about. Turns out she’s from my home state of Michigan! No wonder she’s so nice….

A photo and blurb on the article showed up on the front page of the paper that day, so I’m delighted!

GOOD THINGS COME IN THREE’S

Wow, what a day!

This morning I was dee-lighted to see I was featured on Cynthia Tinapple’s well-curated, internationally focused polymer art website, Polymer Clay Daily. It’s an honor!

Melanie Plenda, freelance journalist, wrote a great article about me and the inspiration for my work for the March 4, 2014 issue of The Union Leader. But I’ll to photo the article for you because I can’t find it online. Thank you, Melanie!

And I’m almost ready for our next/last indoor home tag sale this Saturday, from 10-1! I’ve staged two downstairs rooms full of furniture and wonderful accessories: Vintage dishes, vintage pottery (McCoy!!), silverware sets, pillows, artwork, antique and vintage furniture such as a dining room table, chairs, book shelves and book cases, a child’s antique school desk (I almost wrote “antique child” and that made no sense), vintage glassware, vintage stemware, a very cool doll house, candlesticks, and tons more. Take a peek at my online gallery and check out my special Facebook page for updates. Come if you can, buy right off the virtual site if you can’t come (just email or call me for the items you can’t live without–or just WON’T live without!), and tell your friends, too!

If you stick around, we’ll open the wine!

It's the shiny things in life.....
It’s the shiny things in life…..

And the little things.....
And the little things…..

And the funky things!!

I'm having WAAAAAAY too much fun staging things!
I’m having WAAAAAAY too much fun staging things!

It's felt pretty scattered around here lately, but now I feel like I'm home again.
It’s felt pretty scattered around here lately, but now I feel like I’m home again.

FREE TUTORIAL: How to Repair Pottery with Polymer Clay

I’ve been putting together some projects to write up for my next ebooks. And I actually had a little project today that turned out really well. I thought maybe you’d like to get a free “how to” on how to repair a chipped ceramic piece.

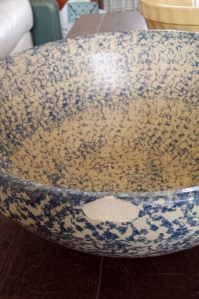
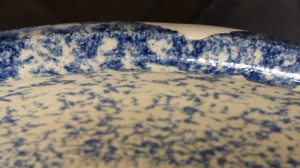
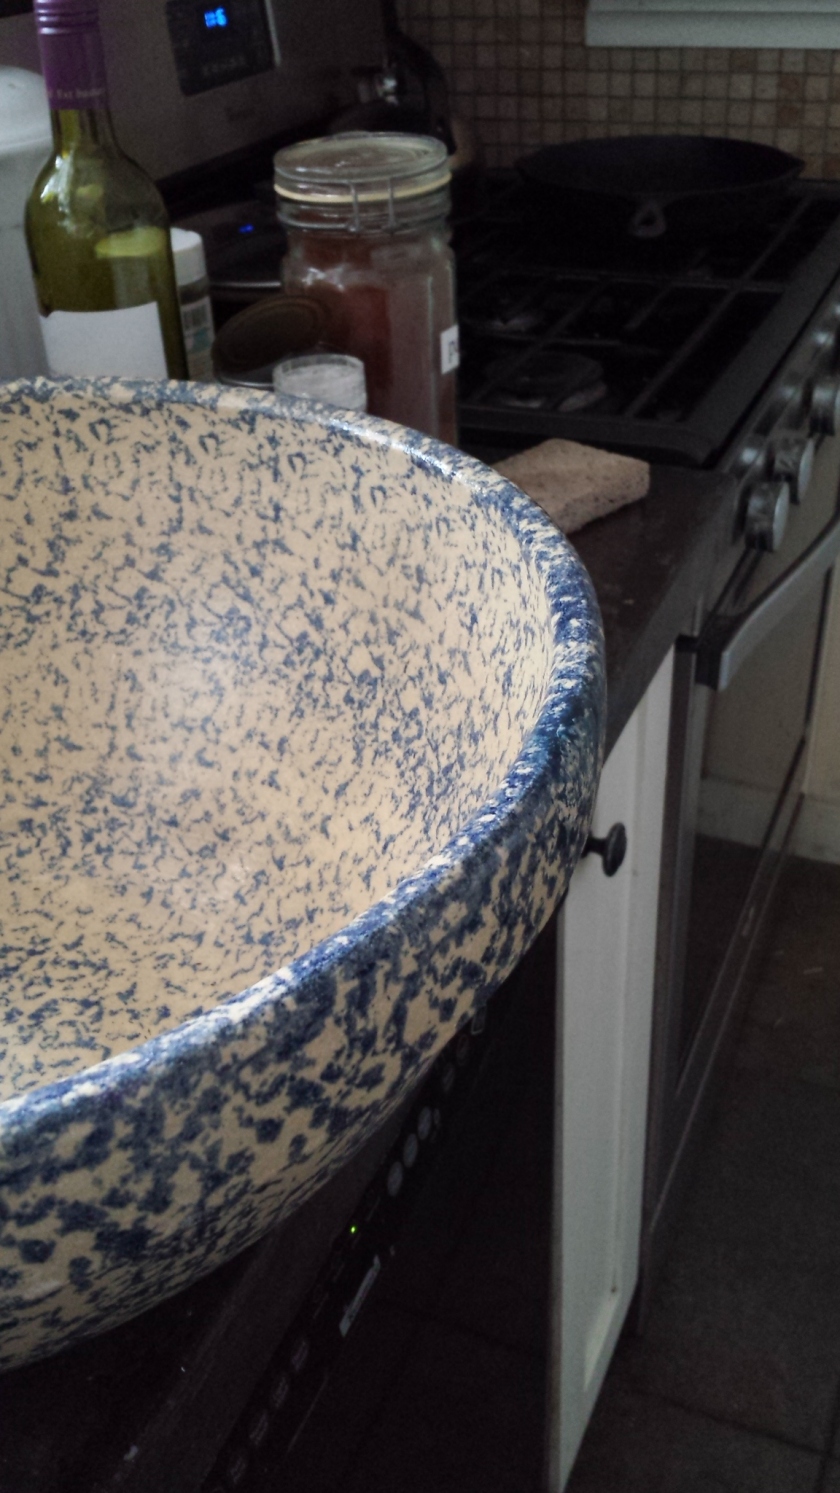
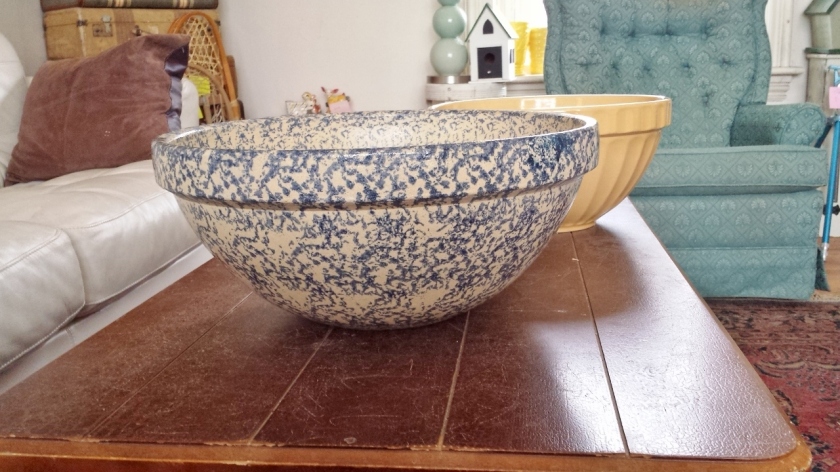
I have a huge old blue-sponged mixing bowl, marked “Robinson Ransbottom, Roseville OH, U.S.A., mixing bowl, 15″ 8 qt.” on the bottom. I’ve had it forever. Someone saw it at my indoor tag sale. I’d forgotten to put it out! (You can see more of the goodies at my online sale gallery.

She wanted to take a closer look. But when my husband brought it down from the cupboard, I found a new chip in the glaze.

Probably got dinged when we emptied the kitchen for remodeling. Ouch!!
Image 1: Probably got dinged when we emptied the kitchen for remodeling. Ouch!!

I was heartsick. The value of this bowl is at least $75. The chip is mostly on the outside of the rim, and won’t affect its usefulness. But it does look bad. (image 1)

Now usually I would take a blue magic marker to something like this. Simply coloring the exposed brighter clay would go far to make the chip less noticeable.

But then I tried a trick I’ve used before.

When a piece gets knocked or notched–a china ear chips off, or a chunk is missing, I actually use POLYMER CLAY to fill it in.

Here’s how you do it:

Materials:
Polymer clay in a matching color. (I used a clay color that matched the base glaze color, and blue acrylic paint for the sponged pattern.)

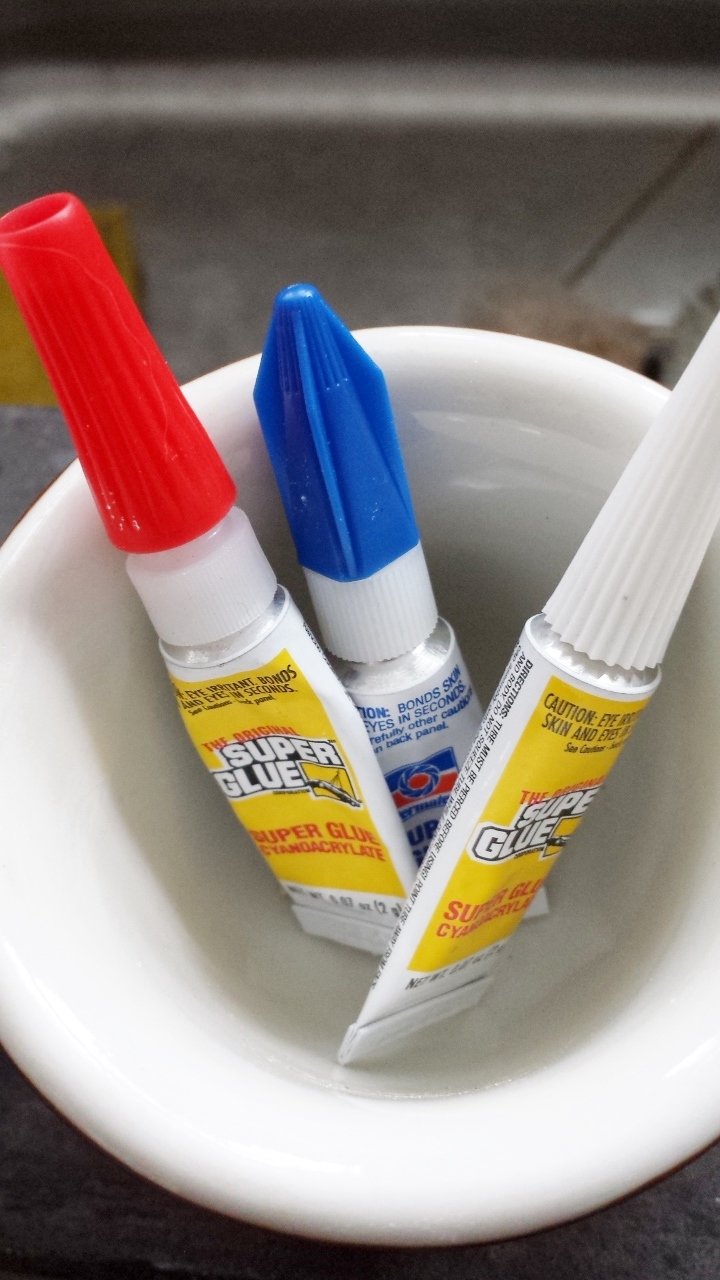
Super glue (image 3)

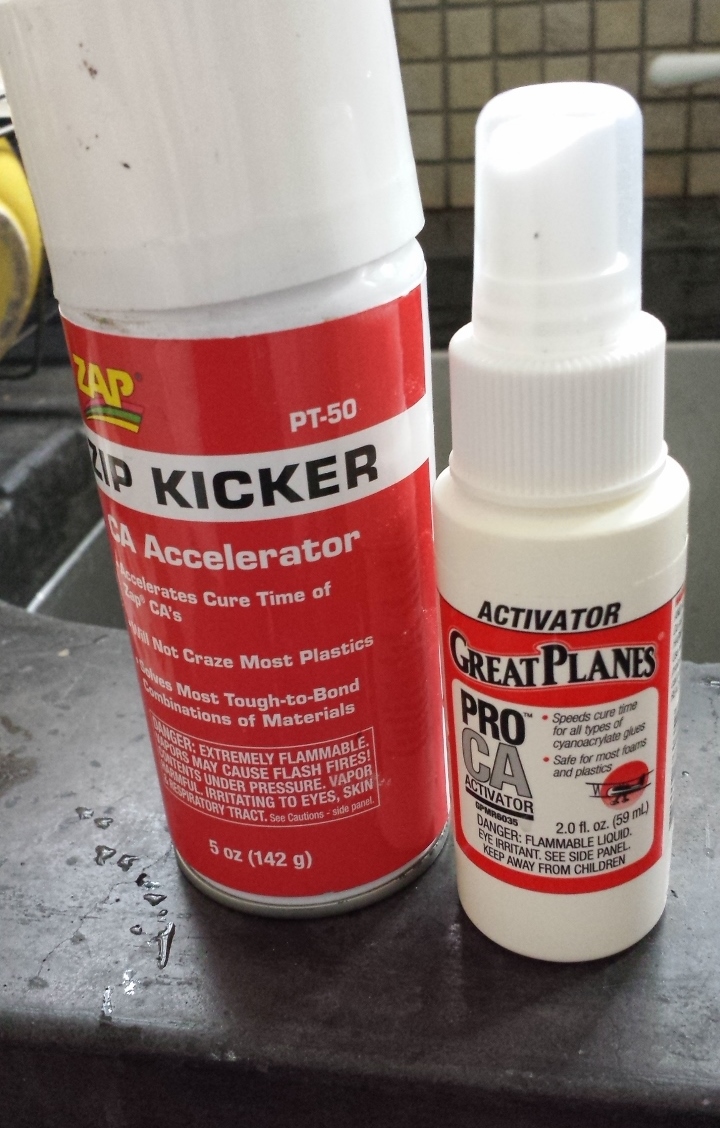
CA activator, Zip Kick activator spray or any other super glue activator (Trust me, this item will be your new best friend when it comes to using super glue!) (image 4)

A piece of rough sandpaper and a small block of wood (I used a rubber stamp because I was too lazy to look for a little block of wood.) (image 5)

3M wet/dry sanding sponge, fine, superfine or ultra fine. (image 5)

Acrylic paint to match (You can use this to paint the entire baked patch, or to recreate a pattern or design like I did) (image 8)

Small paint brush (like tiny small) (image 9)

Paint sponge (or tear off a big chunk of a kitchen sponge and use that.) (image 11)

Soft cloth (I used a kitchen towel because it was there.)

Instructions:
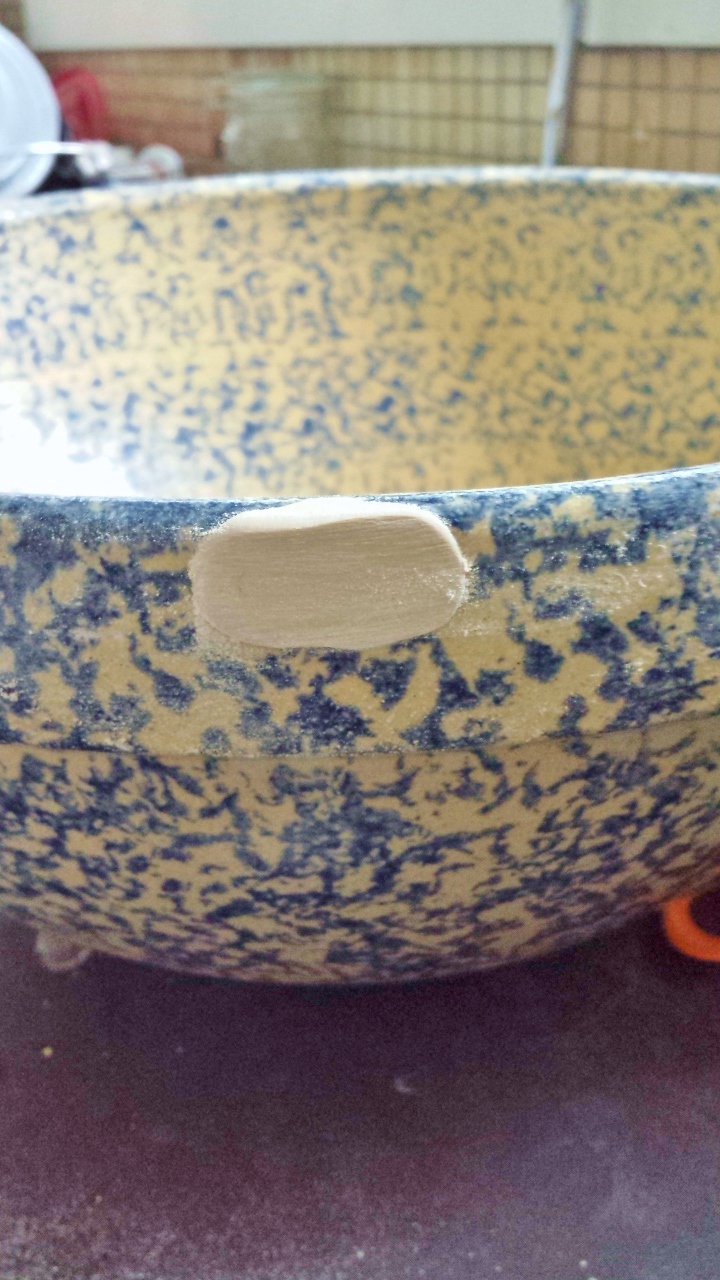
Step 1: Use a chunk of polymer clay in a matching color, or mix to match. In this case, “champagne” was an almost perfect match for the glazed stoneware base glaze. I conditioned it by kneading it until it was malleable, and pushed it into the chipped area. This is what it looked like (Image 2):

It's just a blob o' polymer clay right now, but keep reading!
Image 2: This is actually a photo of the first sanding, but I forgot to photograph the “raw” blob. Use your imagination: “Blob”

Really push the clay into the chipped space. You want a good contact with the clay surface for a good fit.

Step 2: Gently remove your lump o’clay patch. Try not to deform the lump. Bake it in your firing oven at 265 degrees (or the manufacturer’s recommendation) for 30 minutes. Let cool and remove from oven.

Step 3: Apply glue to the object’s surface. (image 3) (You can apply glue to either surface, but I figured it would be easier to work with a glue-free chip-filler blob. You may be more careful than I usually am.) Remove the cap from your glue activator. (Image 4)

What does the glue activator do? It makes super glue set INSTANTLY.

The problem with many super glue repairs is, it takes pressure and a bit of time for the glue to set. Although it’s supposed to be “instant”, sometimes it just takes a little longer. But move the patch before it’s dry, or if it isn’t lined up exactly, the attached piece will pop off.

When you spritz the glued area with the activator, the activator will seep into the glued area and INSTANTLY set the glue. It ensures a faster, more reliable adhesion.)

Any kind of super glue will work.
Image 3: Any kind of super glue will work.
Your new best (super glue) friend!
Image 4: Your new best (super glue) friend!

Step 4: Line up the patch with the chip, and press the patch/chip-filler as hard as you can with one hand. With your other hand, spritz along the EDGE of your patch, as if you were trying to squirt into the tiny space between the patch and the chip. (This is why you need to have the activator cap off beforehand. Trust me. I’ve learned the hard way.)

The patch should stick instantly.

If it doesn’t, apply a drop of glue to an area that are free of the first glue try, and try it again. (Glue won’t stick to glue.) You only need a tiny area to “catch” to make an effective patch.

So now you have a glob of baked clay stuck to your bowl. What now?

Step 5: Now we’re going to sand it down to match the surface shape of the bowl. For a large smooth profile like the bowl, rough sandpaper wrapped around a hard, flat thing (like a little block of wood!) will help you smooth and shape the surface of the patch. (image 5)

If you wrap the coarse sandpaper around a small block of wood, you can sand harder and more evenly.
image 5: If you wrap the coarse sandpaper around a small block of wood, you can sand harder and more evenly.

You’re removing enough patch mass (a new phrase!) to fit in the the bowl’s original profile. (image 6) Stop before you’ve gone TOO far, though! You can always take off more, but you can’t add it back in later.

image 6: Here's the first sanding pass with the heavy grit sandpaper. You remove enough of the patch to match the bowl's "profile".
image 6: Here’s the first sanding pass with the heavy grit sandpaper. You remove enough of the patch to match the bowl’s “profile”.

When you’re pretty close to matching the surrounding surface, switch to the finer sanding sponge. Polymer clay sands smoother and faster with water (since it tends to gum up sandpaper quickly), so dampen the sanding sponge if you’d like.

Polymer doesn’t have a grain, so it won’t matter what direction you sand it in. You can go vigorously (especially with the dry sandpaper) until you are within shaping-range. And focus on the patch, not the rest of the bowl. Glaze is really tough and hard to scratch. But you don’t want to test that, either!

I used a circular motion around the edges of the patch, so I could REALLY smooth them out.

When you’re finished, the patch should feel almost seamless to the touch.

And it should look like this (image 7) :

Lookin' good! Lookin' REAL good!
image 7: Lookin’ good! Lookin’ REAL good!

Now, if you were mending a solid color item, and you used a patch made with clay that matches it, you could stop here.

But we have a sponged design on the bowl, and the repair is still obvious. I COULD have used a blue patch, and it would have been less noticeable. But I wanted to see if I could actually….

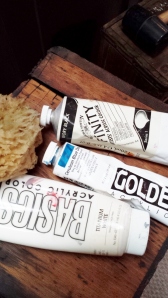
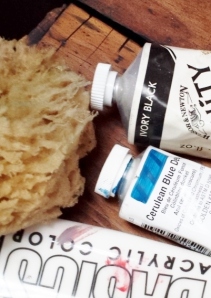
Step 6: Paint the patch! So here are the paints (image 8):

It's rare you'll have the EXACT color match, and I'm bad at matching color, so I got white and black, too.
image 8:It’s rare you’ll have the EXACT color match, and I’m bad at matching color, so I got white and black, too.

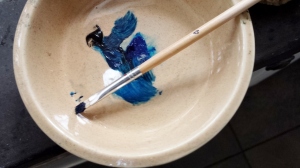
You need very little paint to sponge, so just a tiny squish of each color ought to do it. (image 9)

Almost got it!
image 9: Almost got it!

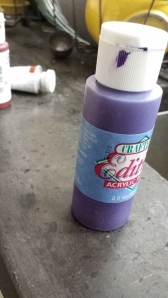
I still didn’t have the right shade of blue. Maybe purple….? But do I have any purple? I hardly ever use that color….

Yes! (image 10)

I had exactly one bottle of purple acrylic paint!
image 10: I had exactly one bottle of purple acrylic paint!

And now for the sponge (image 11).

There's the sponge! Hangin' out with the paint tubes.
image 11: There’s the sponge! Hangin’ out with the paint tubes.

Step 7: Wet the painting sponge (not the sanding sponge!) and squeeze it nearly dry. Dab it into your paint and test with a piece of white paper. (I forgot this, so I just grabbed a paper towel.) After you experiment a little, you’ll get a feel for how much paint, how hard to sponge, etc.

Wow! Pretty good!
image 11: Wow! Pretty good!

Sponge your patch! (image 11) As you can see, I put on a lit-tul too much. (image 9) I should have quit sooner. But it still looks pretty awesome, doesn’t it?

Step 8: Let the paint dry thoroughly, then buff with a soft dry cloth. This will shine up the paint a little, enough to match the soft shine of the bowl itself.

Now….can you see the patch? (image 10)

Ignore the cabinet knob that looks like it's sticking out of the bowl.
image 10: Ignore the cabinet knob that looks like it’s sticking out of the bowl.
WOW!!!!
image 11: WOW!!!!

Can you see it here? (image 11)

Now for the hard question: How durable is this repair? And how safe is it for food purposes?

I wouldn’t bake this bowl. The polymer clay is safe to heat up to 300 degrees or so. But it can scorch at higher temperatures. But why would you bake a mixing bowl???

How durable is the paint treatment? I use acrylic paint as a glaze on my handmade artifacts. I DON’T use any glazes or finishes over the paint–just polishing with a power buffer. Some of them have gone through the laundry, or into hot tubs, or swimming, and the paint has been okay. I think the polishing, even with just a cloth, helps shine and “seal” the surface somewhat. But I wouldn’t put this bowl in a tub of soapy dishwater, nor put it in the dishwasher. (But it’s too big for a dishwasher anyway!)

It’s food-safe, so you can certainly use the bowl to hold stuff: Fruit (real and faux), billiard balls (!!), and so on. If you use it to actually mix stuff, I would wash and rinse carefully, making sure not to scrub or soak the patched area.

But it’s still an easy, affordable, effective patch. And I’m delighted with the results!

(Author’s note: I apologize for the awkward formatting. I have never figured out how to layout images and text with WordPress, despite constant experimenting and positioning. If anyone knows of a good tutorial, point me at it!)

LESSONS FROM THE MOVE: Assumptions Hold Us Back

I was so wrapped up with my indoor moving sale, I forgot to tell you about my latest Fine Art Views column!

You can read LESSONS FROM THE MOVE: Assumptions Hold Us Back.

You can see another view of the moving sale as an event on Facebook.

Love how the sunshine makes this glow so richly!

20140302_094127

20140302_102852 (576x1024) (2)

20140302_093208 (1024x554)

Hugely collectible California Pottery "Poppy Trails", with its fabulous rooster motif.
Hugely collectible California Pottery “Poppy Trails”, with its fabulous rooster motif.
Looks like someone's ready for a trip to the north woods! But not us. We're off to California, and some other lucky person can own vintage (working!) snowshoes.
Looks like someone’s ready for a trip to the north woods! But not us. We’re off to California, and some other lucky person can own vintage (working!) snowshoes.
A rainbow of vintage glass pitchers for your table!